Table of Contents
Shiitake (Lentinula edodes) is one of the easiest and most rewarding mushrooms to grow. They are delicious, medicinal, and exquisite in a wide variety of dishes. Shiitake is grown into hardwood logs or in grow kits like other gourmet mushrooms. The cultivation of Shiitake dates back 800 years to Longquan county in China. This makes it the oldest known record of mushroom cultivation!
Methods for cultivating Shiitake Mushrooms
Shiitake can be grown in two different ways. Each has its own benefits and drawbacks. The two ways of cultivating Shiitake are as follows:
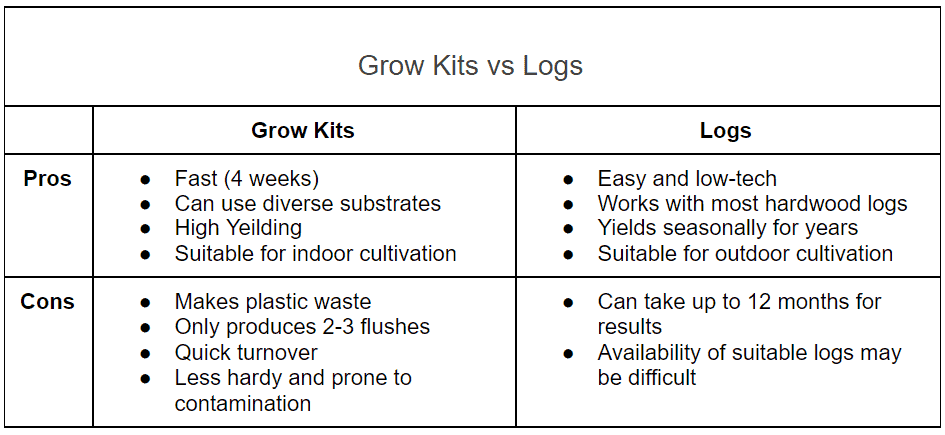
1. Growing Shiitake with Grow Kits
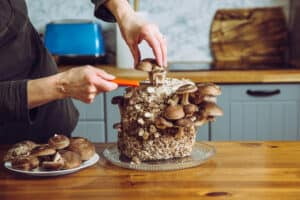
This method involves cultivating shitake mycellium within bags or containers. These are full of a pasteurized substrate and inoculated with mushroom spawn. These bags are the “grow kits”. Once colonized, grow kits fruit in cool and humid conditions
2. Inoculating Logs With Shiitake
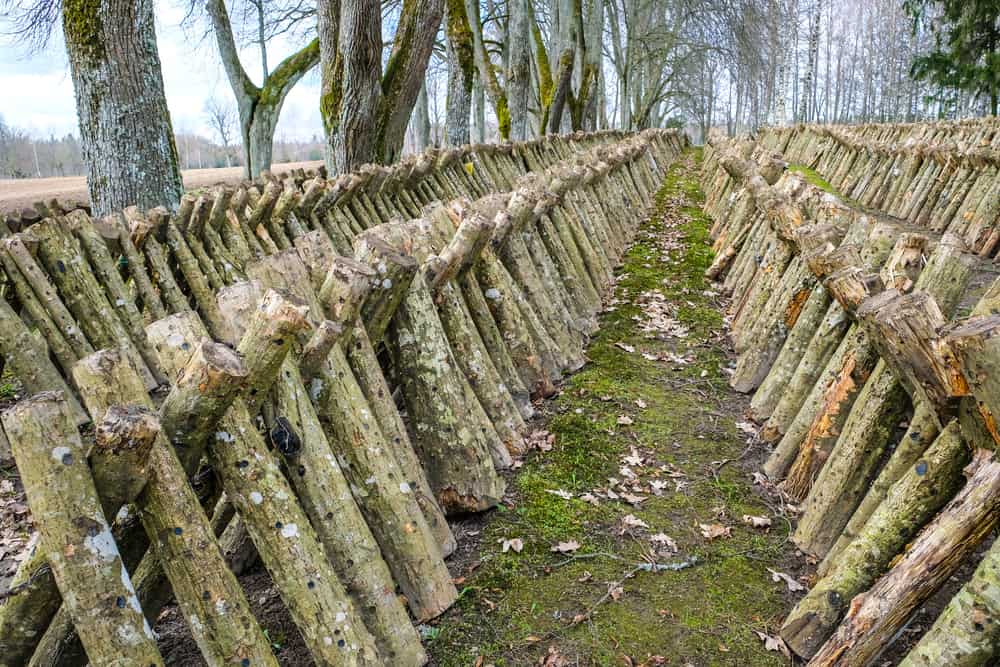
Growing Shiitake in logs is a traditional method that is time-proven. It’s less intensive than grow kits, but its yields are much slower. Instead of a couple of weeks, Shiitake logs can take up to a year before fruiting. The benefit is that this log can last for several years and fruit every year!

How to grow Shiitake with a Grow Kit
1. Materials needed:
- Shiitake (Lentinula edodes) spawn
- Grow bags, buckets, or another clean container. In the case of the last 2, you may want some micropore as well.
- Substrate. Your best option is hardwood sawdust or hardwood fuel pellets. Some growers supplement this with bran, about 1.25 cups per 5lbs block. Supplementation requires sterilization via a pressure cooker.
- If using sawdust, you will want a mesh bag for draining your substrate.
- Large pot, barrel, or something to heat up water for pasteurization.
2. Preparing your Substrate
- Hardwood Sawdust – Make sure you’re using hardwood. This means no pine, cypress, or conifer of any sort! Oak is the best. Eucalyptus, apple, almond, and other fruit trees also work. Wood shavings can also work.
- Hardwood Fuel Pellets – A lot of growers use Hardwood Fuel Pellets because they are easy to find and use. They’re usually used for wood-burning stoves, but work great as a substrate. This is the EASIEST method for beginners.
3. Words on Supplementation
Many growers supplement their substrate with wheat bran. This used at 10-15% within the substrate makes for larger and more vigorous flushes. The tricky thing is that the added nutrient content in makes it more prone to contamination. This makes sterilization with a pressure cooker necessary for supplemented grow kits. We will not cover this.
4. Pasteurizing your Substrate
Pasteurization is the process of eliminating unwanted microorganisms from your growth substrate. These microorganisms may outcompete or attack the mycelium you want to grow.
There are dozens of ways to pasteurize your substrate. Most involving heating your substrate to kill anything present. A general rule of thumb is heating your substrate to temperatures of 180F for 2 hours. There are variations and personal preferences to this rule.
You can do this by putting your substrate in a mesh bag and dunking it in hot water. After 2 hours at 180F, you remove it and let it drain for another 2-3 hours.
Some folks pasteurize within 5-gallon buckets or tubs. This works great with hardwood fuel pellets, which you mixed 1:1 by weight with boiling water. This is enough to pasteurize it and give it the perfect moisture content.
5. Inoculate your Substrate
Prepare a workspace with a table. I like to use a tarp as a table cloth and disinfect it with alcohol. If you’re using buckets or other containers, have these ready, clean, and disinfected.
Have your spawn ready. If your spawn is inside a jar, break it up. You do this by hitting it against a double piece of cardboard on a hard surface.
Make sure to wash your hands and disinfect them. Cleanliness is essential! Have a spray bottle of alcohol handy and regularly disinfect hands and materials.
Now all you do is start putting your pasteurized substrate inside your grow bag or vessel. Layer it with spawn every couple of handfuls. Remember, you will want to use around 5-10% spawn in your inoculation. Stick to the 10% or more mark if it’s your first time!
Close your bags and get them ready for incubation!
6. Incubation
During this time, all you are doing is providing the right environment for growth. You are going to want to keep your grow-kits in a dark place with regulated temperatures. Around 20-25C (68-75F) is perfect, but not necessary.

If you did everything right, in about 4-5 weeks your grow kit should be completely colonized. It should have white, fluffy mycelium covering the substrate. Any contamination will appear as green, red, or colored growths within the substrate.
7. Fruiting
Shiitake requires a drop in temperatures before they will start fruiting. If you are in a cold climate, you can place them outside for a night, as long as it doesn’t go below freezing. Otherwise, you will need to drop the temperature of the room or cold shock the bags. You can cold shock with a fridge or by dunking in an ice bath for 1-2 hours.
After cold shocking, place your kit in a moist environment with indirect sunlight. An environment with humidity up to 90-95% is ideal. Indirect sunlight is important for the color and medicinal properties of Shiitake.
At this point, you can cut open the top of your grow kit. Spray the top with water. After a couple of days, you will see small mushrooms or “primordia’ forming. Within a week, there will be full-sized Shiitake mushrooms.
How to grow Shiitake on Logs
Growing Shiitake on logs is easy and straightforward. It’s much simpler than growing in grow kits, but it takes a lot longer.
1. Materials needed:
- Shiitake dowel spawn. Sawdust spawn also works well. Grain spawn can work, but often gets eaten by animals.
- A hardwood log. Your ideal log is about 15-20 cm (6-10”) in diameter and about a meter (3 ft) long. Oak is the best, but other hardwoods work. Eucalyptus, almonds, apples, and other fruit trees work. It should be around 1-3 months since cut.
- Drill with 9 mm bit or of the corresponding size to the dowel.
- Candle Wax
- Double boiler to melt the wax
- Thick brush
2. Drill Holes
You are going to want to drill holes about as long as your dowels. Drill holes every 10 cm (4 in) across the surface of the log. A greater quantity of holes will result in faster colonization.
3. Inoculate
If you are using dowels, hit them in the holes with a mallet. They should fit snugly. If you’re using another spawn, you can stuff the holes as good as possible. There are actually inoculation tools that can make this much easier, too.
4. Cover with Wax
Now you need to cover the inoculation plugs. This protects them from contamination and critters. We do this with melted wax. Candle wax seems to work the best. Beeswax is less resistent to the weather and other microorganisms.
Take your wax and melt it in a double-boiler. Once your wax melts, “paint” it onto every inoculation site. This will give it a protective coating. It’s also reccomended to cover both ends where it’s missing its protective bark.
5. Incubation and Fruiting
Keep your log in a moist and shady environment. Under your deck or under a tree in your garden are all great places. Larger growers stack them like log towers. In most cases, you can leave your log, and it will naturally fruit when conditions are right.
If you inoculate in the spring, you can expect your first harvest during fall/winter. After 6-8 months, you can also stimulate your log to fruit by dunking it in an ice bath for a couple of hours.

